How to Set Up a Custom Code Widget
Overview
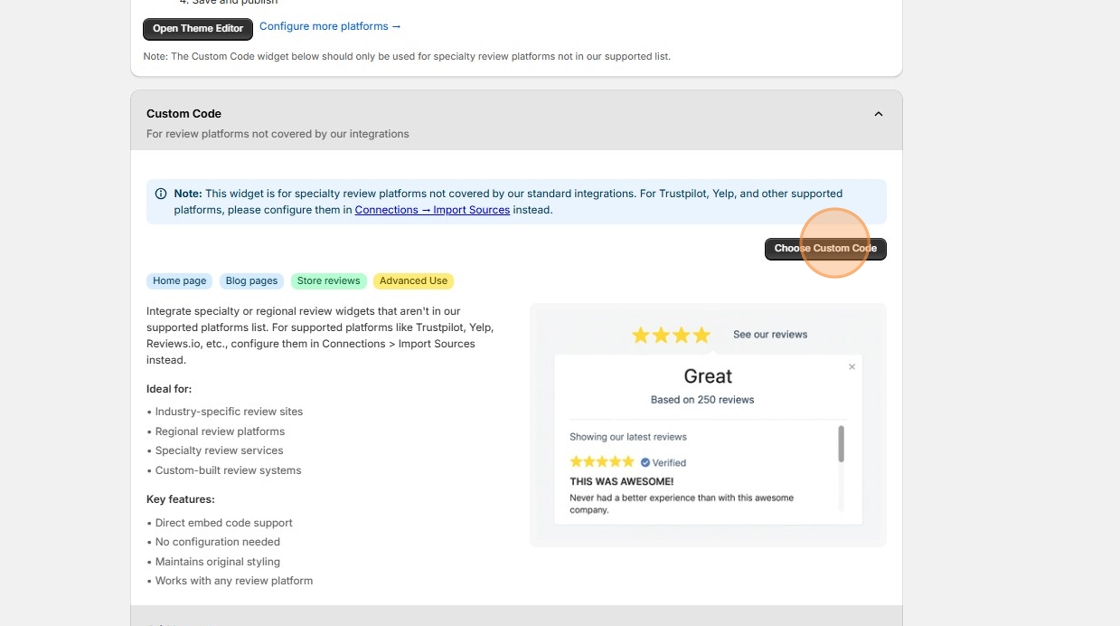
The Custom Code Widget allows you to embed third-party review platform widgets directly into your Shopify store. This feature is designed for specialty review platforms that aren't covered by Review Multiplier's standard integrations. If you're using mainstream platforms like Trustpilot, Yelp, or Google Reviews, we recommend using our built-in integrations instead (found in Connections → Import Sources).
With the Custom Code Widget, you can:
- Display widgets from platforms like Better Business Bureau, Feefo, or other specialized review services
- Maintain full control over the embed code, just like editing your theme files
- Customize the appearance and placement of the widget on your store
This guide will walk you through the complete setup process, from creating your widget to displaying it on your storefront.
Step-by-Step Setup
Creating Your Custom Code Widget
1. Navigate to the screen to create a new widget and click "Choose Custom Code"
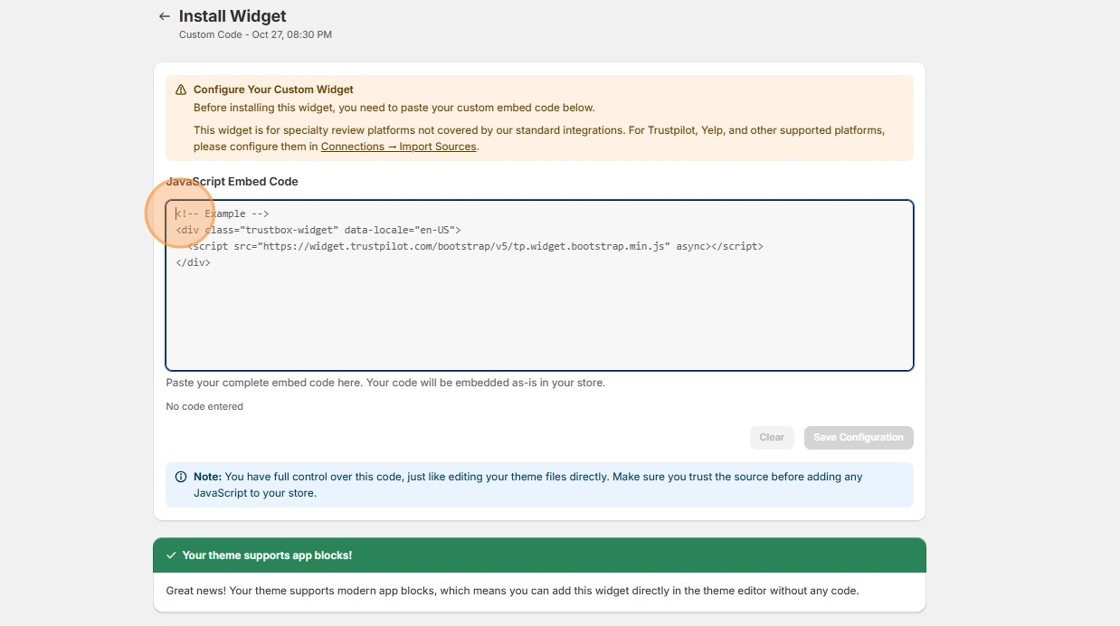
2. Click the Javascript embed code field and paste in the javascript widget code which you wish to display on your Shopify store.
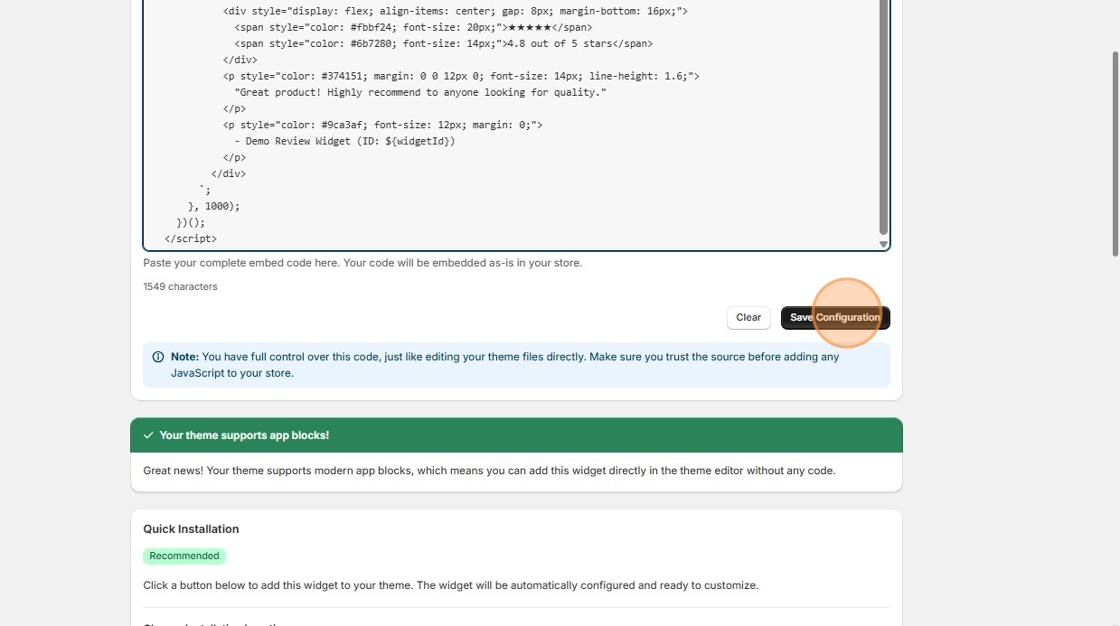
3. Then click "Save Configuration"
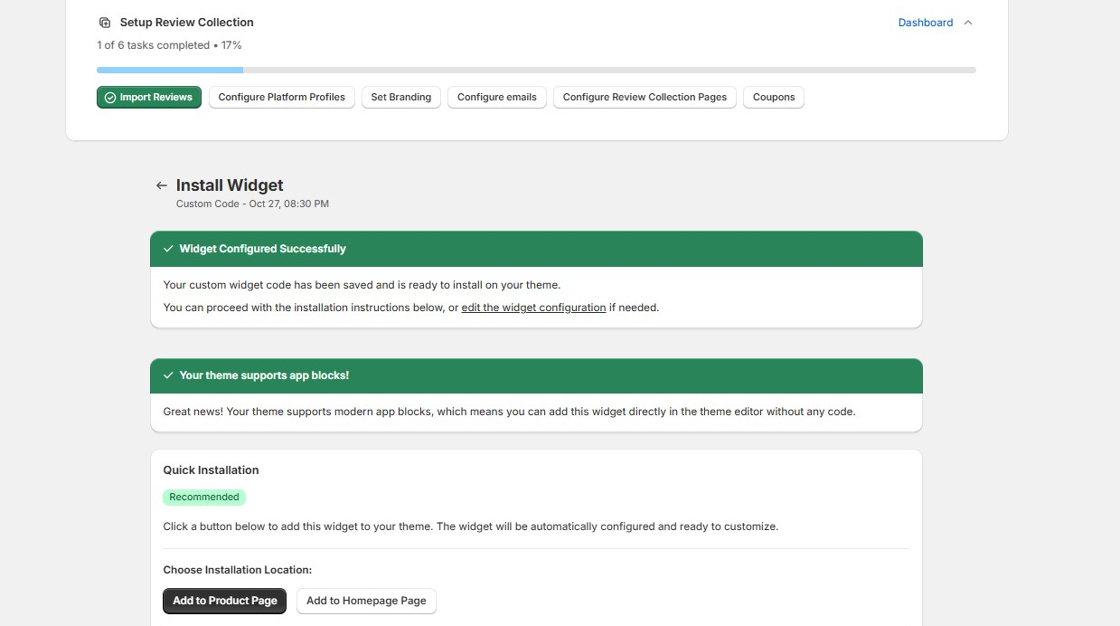
4. You should see a "Widget Configured Successfully" message.
5. Click "Copy"
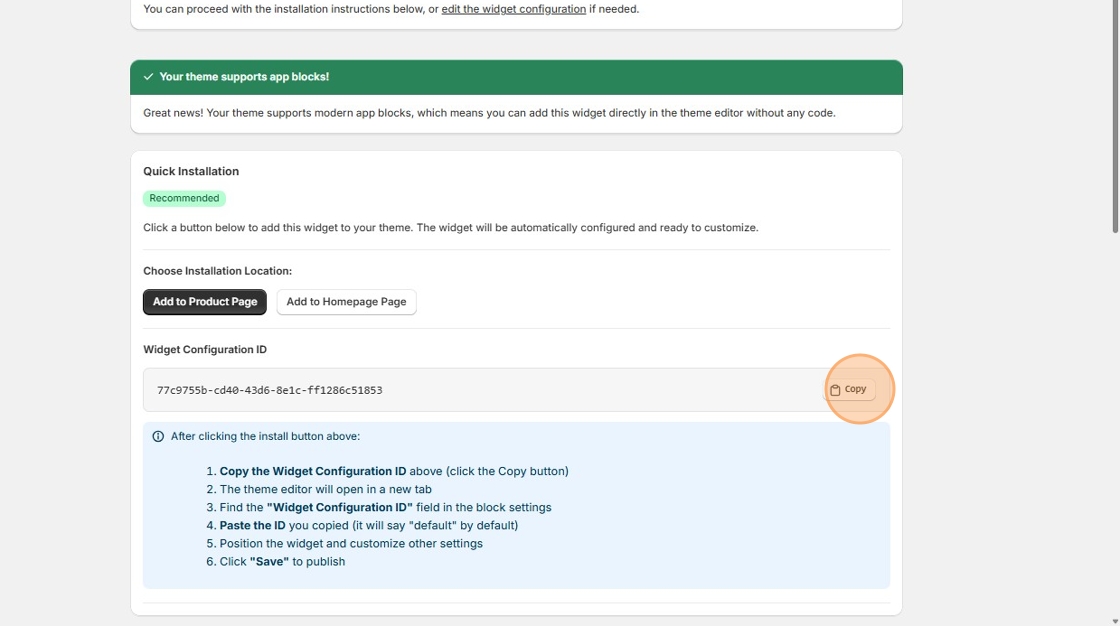
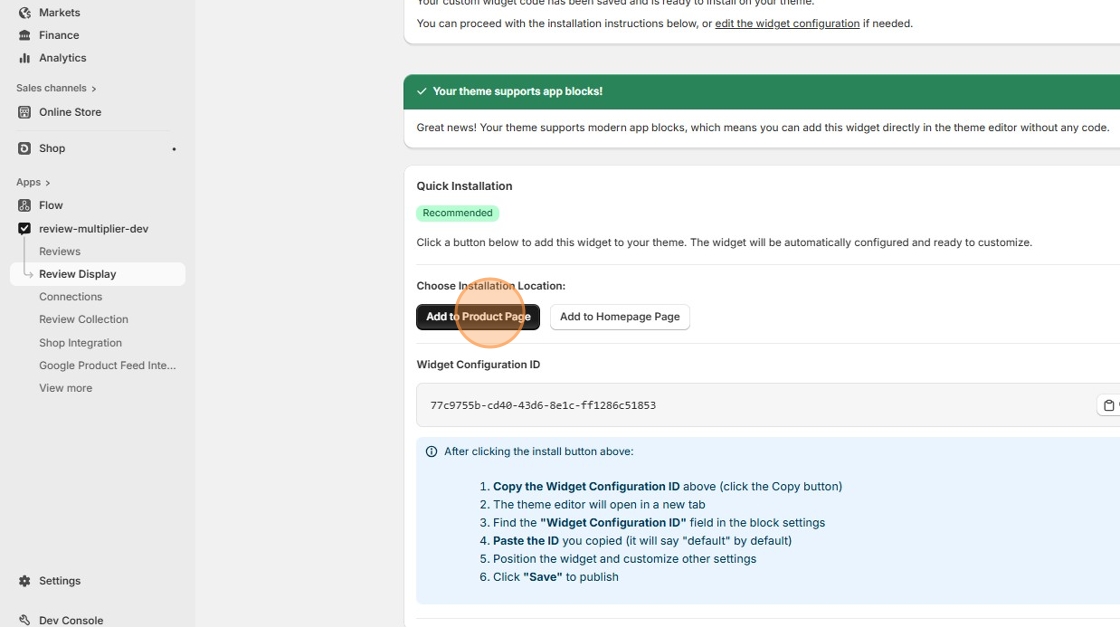
6. Click "Add to Product Page" (or "Add to Homepage Page" if you wish)
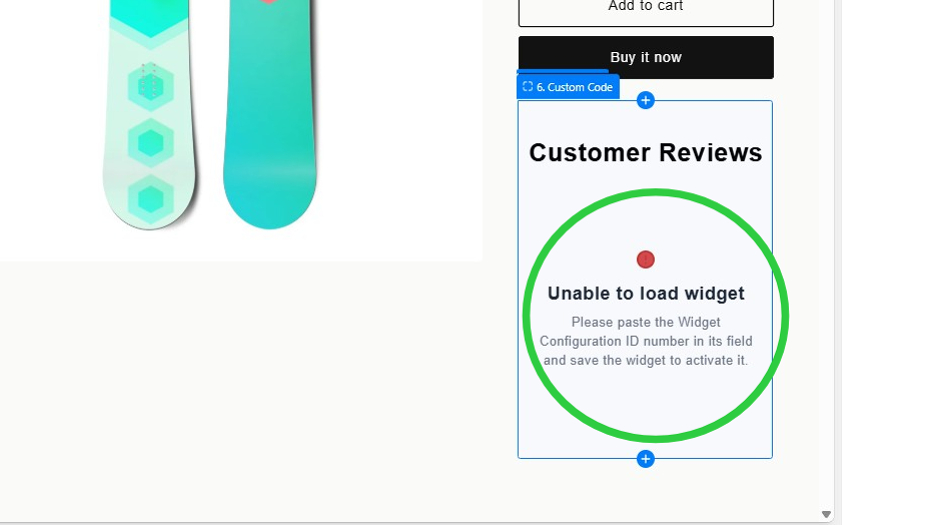
7. Initially you will see a message that shows when widgets have not been configured.
8. Click "default" and paste in the Widget Configuration ID number we copied earlier.
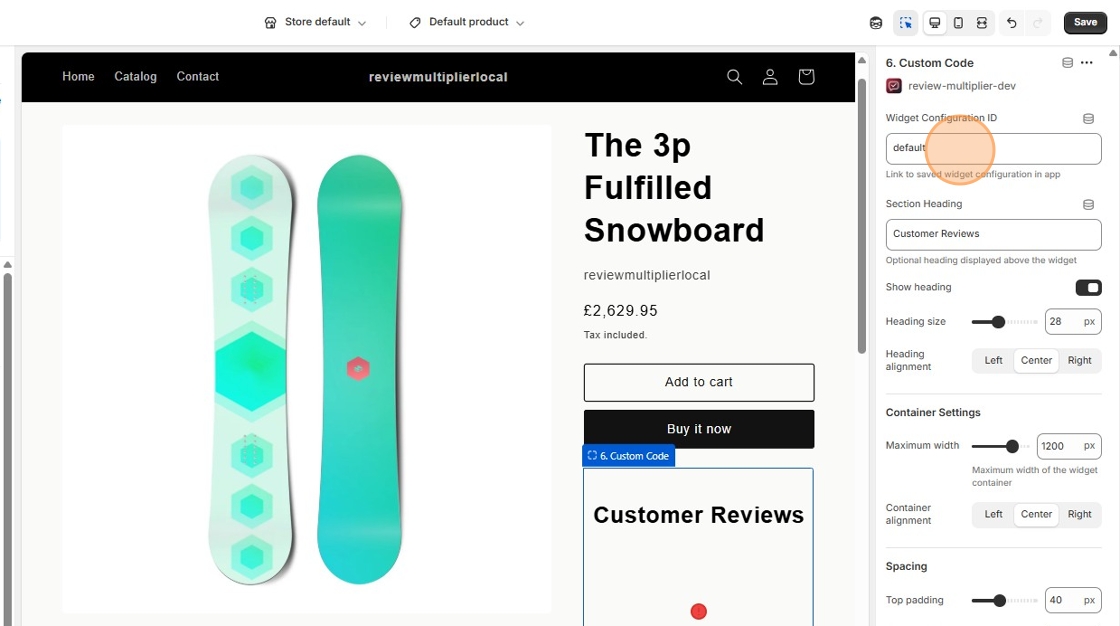
9. Click "Save"
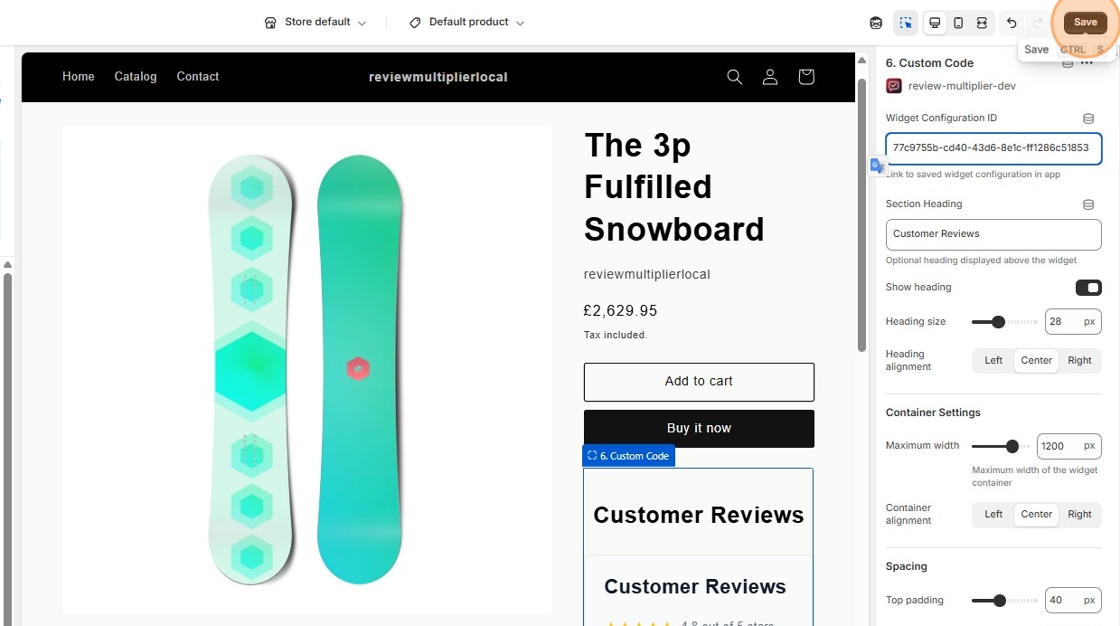
10. The custom widget shows.
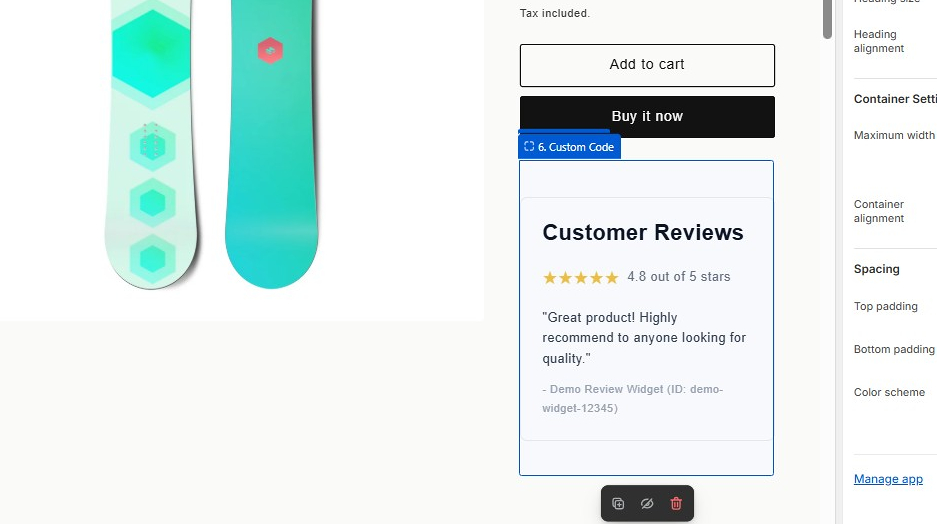
Understanding Widget Settings
Once your custom code widget is installed in the theme editor, you'll see several settings that allow you to customize how it appears on your store. These settings give you control over the widget's appearance, spacing, and placement without needing to edit any code.
Basic Settings
Widget Configuration ID
This is the unique identifier that connects the widget block in your theme to the custom code you configured in the Review Multiplier app. You must paste the ID you copied from the install page into this field for the widget to work. Without this ID, the widget will show an error message asking you to configure it.
Section Heading
The heading text that appears above your widget. By default, this is set to "Customer Reviews," but you can change it to anything that fits your store's branding. For example, you might use "What Our Customers Say," "Verified Reviews," or your review platform's name.
Show Heading
A simple checkbox that controls whether the heading is displayed. Turn this off if you want the widget to appear without any title above it. This is useful if your embed code already includes its own heading, or if you prefer a cleaner look.
Appearance Settings
Heading Size
Controls the size of your section heading in pixels, ranging from 16px to 48px. The default is 28px, which works well for most themes. If your heading appears too small or too large compared to other text on your page, adjust this slider to match your store's typography. A larger heading (40-48px) creates more visual impact, while a smaller size (20-24px) provides a subtler appearance.
Heading Alignment
Choose how your heading is aligned: Left, Center, or Right. Center alignment (the default) creates a balanced, traditional look that works well for most stores. Left alignment gives a more modern, editorial feel, while right alignment is less common but can work for specific design aesthetics or right-to-left languages.
Container Settings
Maximum Width
This setting controls how wide your widget container can grow, ranging from 600px to 1400px. The default is 1200px, which prevents the widget from becoming too wide on large screens and maintains readability. If your widget's embed code creates a narrow display, you might want to reduce this to 800-1000px. For full-width widgets, increase it to 1400px.
Container Alignment
Determines where the widget container is positioned within its section: Left, Center, or Right. Center alignment (the default) keeps your widget centered on the page, which is the most common choice. Use left alignment if you want your widget to align with left-aligned content elsewhere on your page, or right alignment for special layout requirements.
Spacing Settings
Top Padding
Controls the space above your widget in pixels (0-100px). The default is 40px, which provides comfortable breathing room between your widget and content above it. Increase this if your widget feels cramped, or decrease it to bring elements closer together. A setting of 0px creates no space, while 80-100px creates generous spacing for a more open layout.
Bottom Padding
Controls the space below your widget in pixels (0-100px), with a default of 40px. This works the same way as top padding but affects the space between your widget and any content that follows it. Consistent top and bottom padding (like 40px for both) creates visual balance on your page.
Color Scheme
Color Scheme Selection
Choose from Scheme 1, Scheme 2, or Scheme 3. These schemes use your theme's predefined color palettes to ensure your widget matches your store's overall design. The specific colors depend on your theme's settings:
- Scheme 1 typically uses your theme's primary color scheme
- Scheme 2 often uses an alternative or accent color scheme
- Scheme 3 usually provides a third variation for variety
Preview each scheme to see which one best complements your widget's colors and your page design.
Best Practices
Getting Your Embed Code
Before creating a custom code widget, log into your review platform's admin panel and locate their widget or embed code generator. Most platforms provide this under sections labeled "Widgets," "Embed," "Integration," or "Website Tools." Copy the complete code, including both HTML and any <script> tags.
Code Safety
The Custom Code Widget gives you the same level of control as editing your theme files directly. Only paste code from review platforms you trust. Review Multiplier doesn't validate or modify your code—it's embedded exactly as you provide it. This is by design, giving you complete flexibility.
Testing First
If you're unsure about your embed code, test it on a development store or preview theme first. This allows you to verify the widget displays correctly before showing it to customers. Check how it looks on both desktop and mobile devices.
Content Security Policy (CSP)
Some external scripts may be restricted by your browser's Content Security Policy. If your widget doesn't load, check your browser's console for CSP errors. In most cases, reputable review platforms have already worked with Shopify to ensure their widgets load correctly.
When to Use Standard Integrations
Remember: the Custom Code Widget is specifically for specialty platforms. If your review platform is supported by Review Multiplier's standard integrations (Trustpilot, Yelp, Google Reviews, etc.), use those instead. Standard integrations offer:
- Automatic review imports and updates
- Better performance and caching
- Advanced filtering and display options
- Analytics and tracking
- No code required
Only use Custom Code Widgets when you need to display reviews from a platform we don't integrate with directly.
Troubleshooting
Widget shows "Unable to load widget" message
- Verify you've pasted the correct Widget Configuration ID in the theme editor
- Check that you've saved the widget block in the theme editor
- Ensure your custom code was saved successfully in the app
Widget displays but looks broken
- Review your embed code for any errors or missing closing tags
- Check if the review platform's service is operational
- Try the embed code on a test HTML page to verify it works outside Shopify
Widget doesn't appear at all
- Make sure you've added the widget block to your theme
- Check that the widget status is set to "Active" in the app
- Verify the page template you're viewing matches where you installed the widget (product page vs. homepage)
Need Help?
If you encounter issues setting up your custom code widget, please contact Review Multiplier support with:
- Your Widget Configuration ID
- The review platform you're trying to embed
- Screenshots of any error messages
- Your store URL and the page where you're trying to display the widget
We're here to help ensure your reviews are displayed beautifully on your store!